A Repeatable Client Site Provisioning Checklist for WordPress Agencies

Most agencies do not have a WordPress provisioning problem. They have a consistency problem. Every developer spins up a new client site their own way: a slightly different plugin list, a different starter theme, a different set of baseline pages. Multiply that across a team and a portfolio of forty clients and your “standard setup” is standard on paper only.
A repeatable provisioning checklist fixes this. When every new client site is created the same way, in the same place, with the same baseline, onboarding stops being tribal knowledge and becomes a five-minute routine anyone on the team can run. This guide is that checklist, built around GrabWP Tenancy, which runs every client site as an isolated tenant inside one WordPress installation, with no Multisite required.
Why Ad-Hoc Provisioning Costs You
Provisioning one client site by hand is fine. Provisioning the fortieth by hand is where agencies quietly lose margin:
- Setup drift. You improve your process on client 30, but clients 1 through 29 never got the upgrade. Each site carries the habits of whoever built it.
- Onboarding depends on one person. If the developer who “knows the setup” is out, the next client waits.
- Environment sprawl. Forty separate installs means forty hosting accounts, forty sets of credentials, forty update queues. That is not scale, that is overhead that grows with every client you win.
The goal is a provisioning routine that produces an identical, correct starting point every time, regardless of who runs it.
The Provisioning Checklist
The whole routine runs from a single WordPress dashboard. Steps 1 and 2 are one-time setup; steps 3 through 6 repeat for every new client.
Step 1: Build your agency standard as a starter tenant (once)
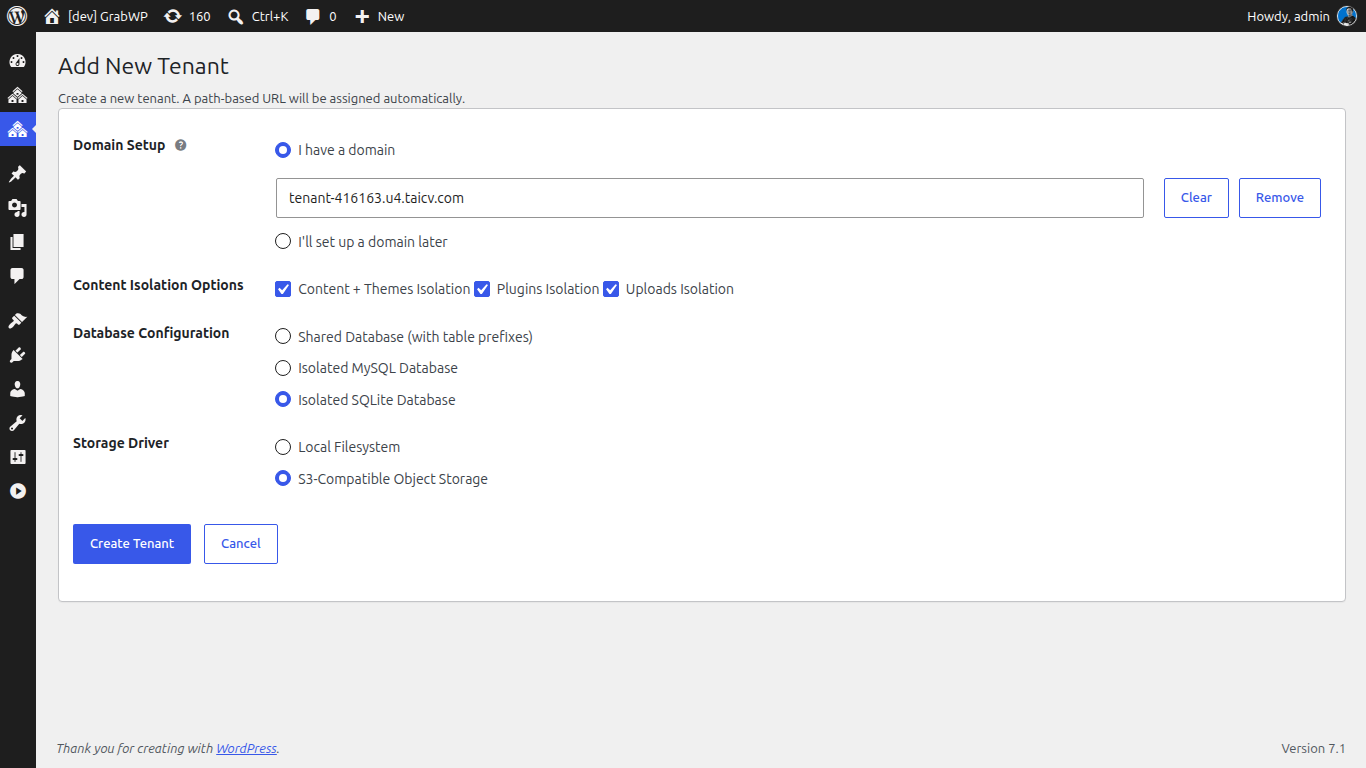
Create one tenant that represents how your agency starts every project, and treat it as the template:
- Your default theme, configured to your house style
- Your standard plugin stack: forms, SEO, security, caching, page builder
- Baseline pages: Home, About, Contact, Privacy, and a blog scaffold
- Default menus, placeholder branding, and your usual settings
The more complete this starter is, the less per-client setup work remains. You can also keep your main site as the clone source, since GrabWP allows the main site to be used as a template.
Step 2: Decide your database and routing defaults (once)
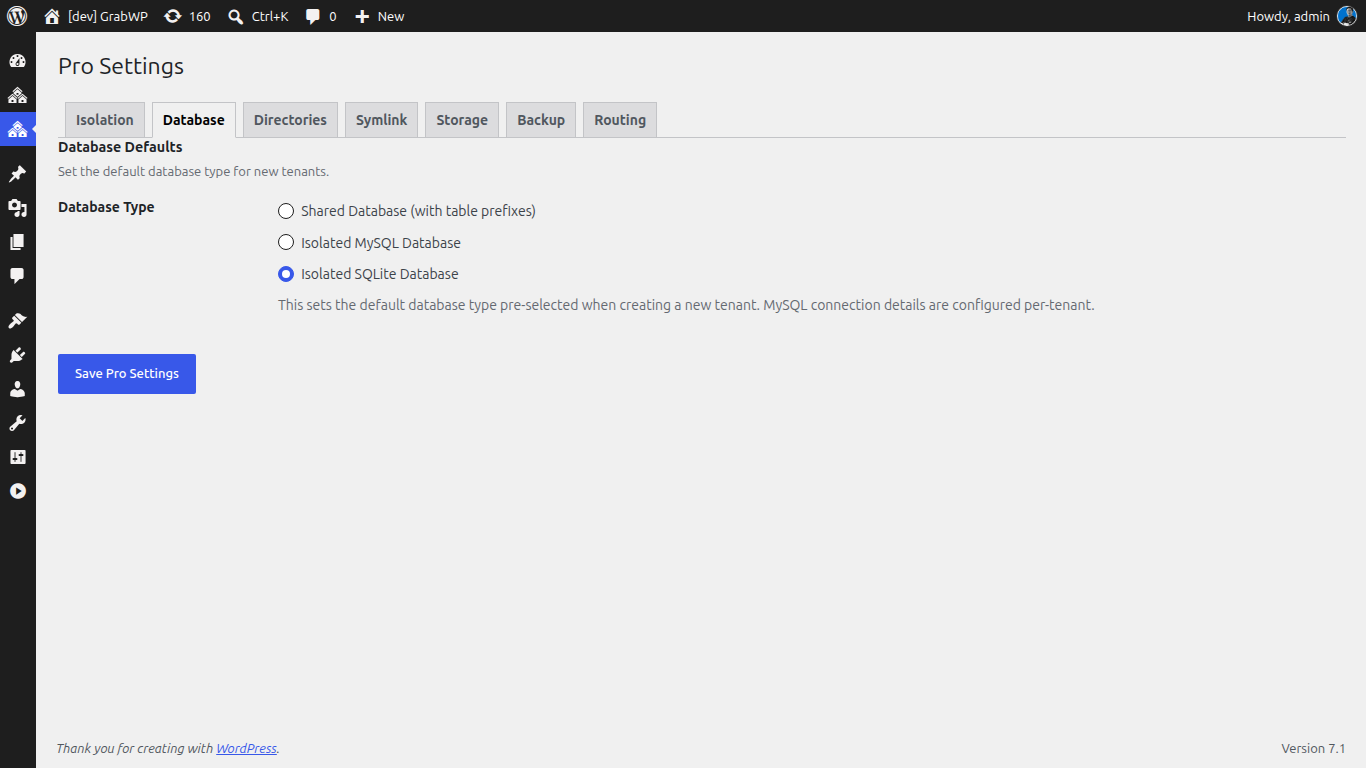
In Pro Settings, set the defaults every new tenant should inherit so your team does not decide these per project. GrabWP Tenancy Pro lets you choose, per tenant, between shared MySQL with table prefixes, a dedicated MySQL database, or a SQLite database. For agency client work, a dedicated database per client gives you real data isolation rather than a shared schema. Set the default that matches your standard, and individual projects can still override it.
While you are here, set your path prefix under the Routing tab, for example site, so in-progress client sites get clean URLs like yoursite.com/site/client-name.
Step 3: Clone the starter for the new client
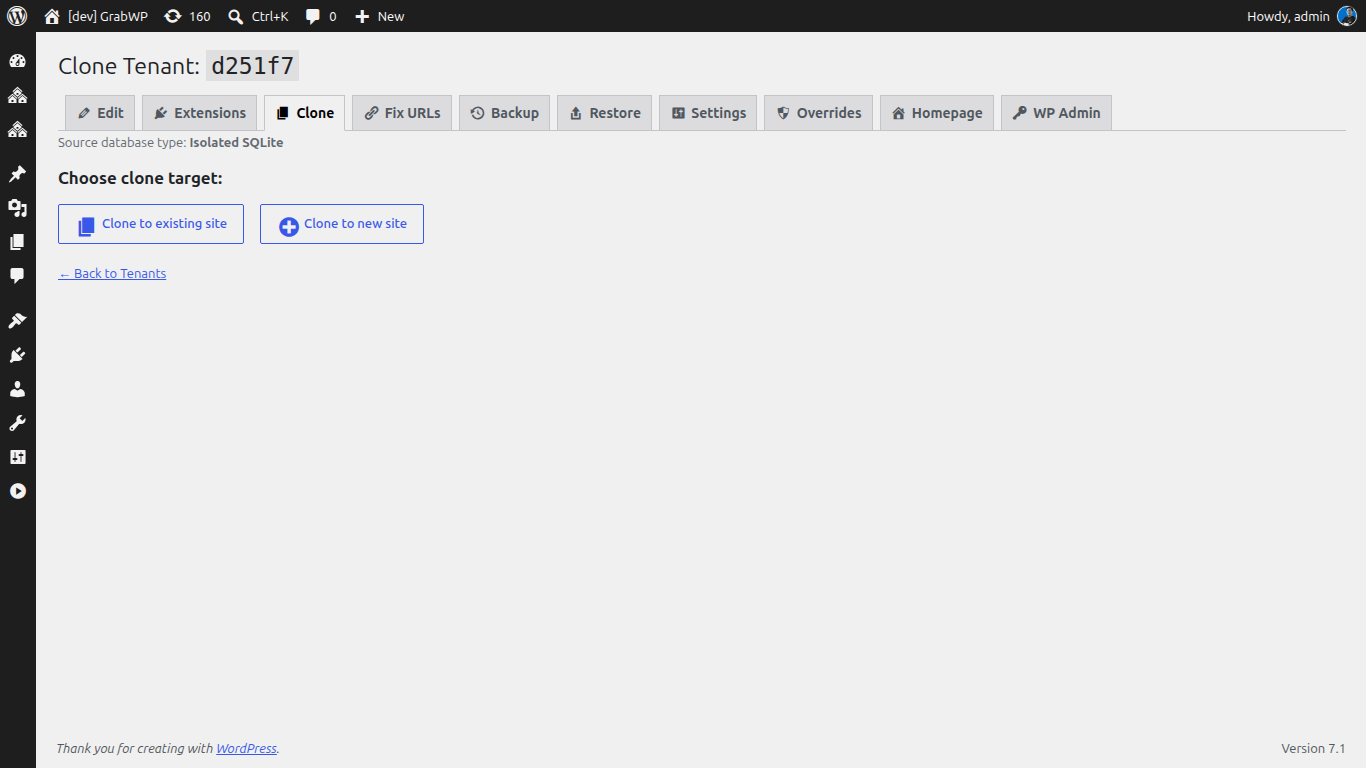
When a project lands, clone the starter tenant instead of building from scratch. GrabWP’s cloning copies the source tenant’s database tables and its uploaded files into a new tenant, then rewrites the site URL automatically so the new site loads correctly out of the box. On Pro this runs as a step-by-step AJAX workflow and supports SQLite as well as MySQL. The clone copies real files but skips symlinks, so shared plugin and theme directories are not duplicated onto disk.
When the clone finishes, GrabWP shows the new tenant’s ID with direct links to edit the tenant, open its homepage, and open its dashboard, so the team member can jump straight in.
Step 4: Assign the client’s address
Give the new tenant a working URL immediately. GrabWP offers two routing styles:
- Path alias, such as
yoursite.com/site/client-name, which needs no DNS changes and is ideal while the project is in progress. Aliases are validated (3 to 30 characters, lowercase letters, numbers, and hyphens) and each is unique across tenants. - Custom domain or subdomain, such as
clientname.comorclient.youragency.com, for launch.
Because the path alias needs no domain setup, you can hand a stakeholder a live preview link in minutes and map the real domain only when the client is ready to go live. When alias routing is on, the raw tenant-ID URL 301-redirects to the alias, so links stay clean.
Step 5: Set the client’s isolated stack
This is where per-client work begins on top of a trusted baseline. On the Pro plan each tenant gets its own isolated wp-content directory, so one client can run WooCommerce while another runs a membership stack with zero plugin conflicts. Activate or deactivate plugins and switch themes for the tenant from the Extensions page, which shows live status, and adjust tenant options inline from the Tenant Settings page in the main admin.
Step 6: Take a baseline backup and hand off
Before the client or another team member starts editing, capture a clean restore point. Pro gives each tenant its own backup and restore, and you can enable scheduled automatic backups with per-tenant retention on top of that. With a baseline captured, the site is provisioned, isolated, and safe to build on, and every project on your portfolio started from the exact same routine.
Why This Beats a Provisioning Wiki
Plenty of agencies document their setup in a wiki: install these plugins, configure these settings, create these pages. A document helps, but it still relies on a human executing forty manual steps correctly every time, and on a separate hosting account and install being provisioned first.
The tenant approach turns the document into an action. There is no separate install to provision, because every client is a tenant inside one WordPress. The baseline is not a checklist someone follows, it is a starter you clone. And the whole portfolio lives under one dashboard and one license, with each client isolated from the rest. Your provisioning quality stops depending on who is on shift.
Start Standardizing
Build your starter tenant once, set your database and routing defaults, and your next client site is a five-minute clone-and-map instead of an afternoon of setup. GrabWP Tenancy Pro is licensed once per installation, with no per-client fees, starting at $9.99/month. See the full picture on the agency page, or start with the multi-tenancy setup guide to get your first install running.
Tác giả
GrabWP Team
WordPress Multi-Tenancy Experts
The GrabWP team builds and maintains the GrabWP Tenancy plugin, helping developers and agencies run scalable multi-tenant WordPress platforms. With years of experience in WordPress core, hosting infrastructure, and plugin development.
Câu hỏi thường gặp
- Does every developer on the team need their own license?
- No. GrabWP Tenancy Pro is licensed once per WordPress installation, not per seat or per client. Your whole team provisions and manages tenants from the same install under one license.
- Can we standardize the plugin and theme stack for every new client?
- Yes. Build one starter tenant with your agency's standard theme, plugins, and baseline pages, then clone it for each new client. The clone copies the source database tables and uploaded files and rewrites the site URL, so every project starts from the same baseline.
- How do we give a new client site a clean URL before the domain is ready?
- Use a path alias such as yoursite.com/site/client-name while the project is in progress, then map the real domain or subdomain at launch. Path routing needs no DNS changes, so the site is demo-ready immediately.
Editorial standards: Our content is written by WordPress experts with hands-on multi-tenancy experience. Articles are fact-checked and regularly updated to ensure accuracy.